
概要
Lightning Web Componentで複数のコンポーネント間でパラメータを引き渡して連動して動作するための通信を行う仕組みについて整理してみました。
Custom EventとLightning Message Serviceの方法を用いて、下記のように殆ど同じ動作をするサンプルを作ってみたので、それぞれでどのような実装になるかを記載します。
デモ
ソースコードはこちら
https://github.com/yhayashi30/lwc-pub-sub
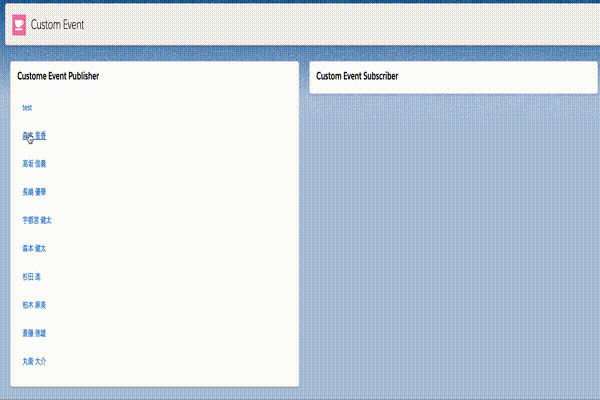
Custom Event デモ
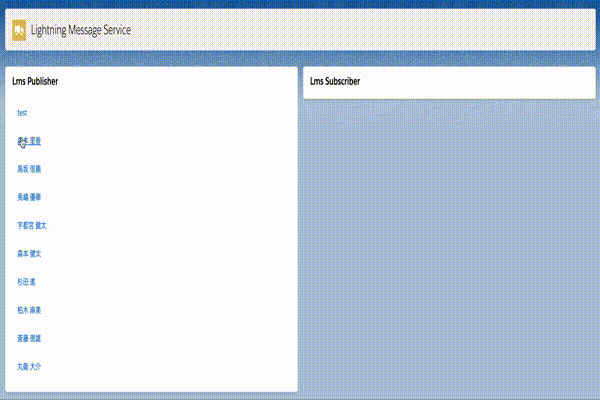
Lightning Message Service デモ
Custom Event
Custom Eventは標準のDOMイベントとなります。Custom Eventは、コンポーネント間が階層になっている場合に上位と通信する際に使用することができます。detailパラメータであらゆる型のデータを引き渡すことができます。
Custom EventのPublisher サンプルコード
Custom Eventを作成するには、CustomEvent() コンストラクタを使用します。
Custom Event() コンストラクタでは、第一引数のイベント名を表す文字列のみが必須のパラメータとなります。(サンプルでは”selected”を使用。onは付けなくて良いので注意。)
Custom Eventをディスパッチするには、EventTarget.dispatchEvent() メソッドを引数に作成したCustom Eventをセットして実行します。
Custom Event自体にパラメータを設定したい場合には、detailプロパティを用いてJSONで自由に定義して、受信側でeventリスナーを通じてアクセスすることができます。サンプルコードでは選択したContactのSalesforce IDを渡すようになっております。
let customEvent = new CustomEvent('selected', {
detail: {
    value: event.currentTarget.dataset.value
}
});
this.dispatchEvent(customEvent);
<template>
<lightning-card title="Custome Event Publisher">
<div class="slds-m-around_medium">
<template if:true={contacts.data}>
<template for:each={contacts.data} for:item="contact">
<a href="#"
key={contact.Id}
onclick={handleContactClick}
data-value={contact.Id}
>
<lightning-layout vertical-align="center">
<lightning-layout-item padding="around-small">
<p>{contact.Name}</p>
</lightning-layout-item>
</lightning-layout>
</a>
</template>
</template>
</div>
</lightning-card>
</template>import { LightningElement, wire } from 'lwc';
import getContactList from '@salesforce/apex/ContactController.getContactList';
export default class Publisher extends LightningElement {
@wire(getContactList)
contacts;
handleContactClick(event) {
event.preventDefault();
let customEvent = new CustomEvent('selected', {
detail: {
value: event.currentTarget.dataset.value
}
});
this.dispatchEvent(customEvent);
}
}Custom EventのSubscriber サンプルコード
subscriberとなるコンポーネントでは、publisherのコンポーネント(c-custom-event-publisher)を子コンポーネントとして設置します。publisherで作成したCustom Eventのイベント名に”on”を付与して(今回のサンプルコードでは”onselected”となる)リスンします。
<c-custom-event-publisher onselected={handleContactSelect}></c-custom-event-publisher><template>
<lightning-layout>
<lightning-layout-item padding="around-small" size="6">
<c-custom-event-publisher onselected={handleContactSelect}></c-custom-event-publisher>
</lightning-layout-item>
<lightning-layout-item padding="around-small" size="6">
<lightning-card title="Custom Event Subscriber">
<div class="slds-m-around_medium">
<p>{Name}</p>
<p>{Title}</p>
<p>
<lightning-formatted-phone
value={Phone}
></lightning-formatted-phone>
</p>
<p>
<lightning-formatted-email
value={Email}
></lightning-formatted-email>
</p>
</div>
</lightning-card>
</lightning-layout-item>
</lightning-layout>
</template>import { LightningElement, api, wire } from 'lwc';
import { getRecord, getFieldValue } from 'lightning/uiRecordApi';
import { ShowToastEvent } from 'lightning/platformShowToastEvent';
import NAME_FIELD from '@salesforce/schema/Contact.Name';
import TITLE_FIELD from '@salesforce/schema/Contact.Title';
import PHONE_FIELD from '@salesforce/schema/Contact.Phone';
import EMAIL_FIELD from '@salesforce/schema/Contact.Email';
const fields = [
NAME_FIELD,
TITLE_FIELD,
PHONE_FIELD,
EMAIL_FIELD
];
export default class Subscriber extends LightningElement {
@api recordId;
Name;
Title;
Phone;
Email;
@wire(getRecord, { recordId: '$recordId', fields })
wiredRecord({ error, data }) {
if (error) {
this.dispatchToast(error);
} else if (data) {
fields.forEach(
(item) => (this[item.fieldApiName] = getFieldValue(data, item))
);
}
}
handleContactSelect(event){
this.recordId = event.detail.value;
}
dispatchToast(error) {
this.dispatchEvent(
new ShowToastEvent({
title: 'Error loading contact',
variant: 'error'
})
);
}
}Lightning Message Service
Lightning Message Serviceを使用することで、Lightningページ内のコンポーネント間でフラットに通信を行うことができます。同じ Lightning ページに組み込まれた Visualforce ページ、Aura コンポーネント、および Lightning Web コンポーネント間で通信を行うこともできます。
Lightning Message Serviceを使用するには、各コンポーネントから呼び出すLightning メッセージチャネルが必要となります。Lightning メッセージチャネルを作成するには、LightningMessageChannel メタデータ型を使用します。LightningMessageChannel を作成するには、SFDX プロジェクトを用いて、force-app/main/default/messageChannels/ ディレクトリにXMLの定義を含める必要があります。LightningMessageChannelのファイル名は、messageChannelName.messageChannel-meta.xml 形式とします。これを作成して、対象の組織にデプロイします。
Lightning メッセージチャネルのサンプル
SFDXプロジェクトの以下のディレクトリに作成します。
/force-app/main/default/messageChannels
Record_Selected.messageChannel-meta.xml
<?xml version="1.0" encoding="UTF-8" ?>
<LightningMessageChannel xmlns="http://soap.sforce.com/2006/04/metadata">
    <masterLabel>RecordSelected</masterLabel>
    <isExposed>true</isExposed>
    <description>Message Channel to pass a record Id</description>
    <lightningMessageFields>
        <fieldName>recordId</fieldName>
        <description>This is the record Id that changed</description>
    </lightningMessageFields>
</LightningMessageChannel>
LMSのPublisher サンプルコード
PublisherのコンポーネントからメッセージチャネルでメッセージをPublishするには、範囲設定されたモジュール @salesforce/messageChannel をコンポーネントの JavaScript ファイルに含め、Lightning Message Service の publish() 関数をコールします。
import RECORD_SELECTED_CHANNEL from '@salesforce/messageChannel/Record_Selected__c';Publisherのコンポーネントの JavaScript ファイルでは、メッセージチャネルと、メッセージチャネルを操作するために必要な Lightning Message Service 関数をインポートします。
import { publish, MessageContext } from 'lightning/messageService';上記でインポートした@wire(MessageContext) を使用して MessageContext オブジェクトを作成します。
@wire(MessageContext)
messageContext;
handleContactClick() メソッドは、Publishするメッセージコンテンツを作成します。Lightning Message Service の publish() 関数は、メッセージコンテキスト、メッセージチャネルの名前、メッセージペイロードの 3 つのパラメータを取ります。メッセージペイロードには自由にパラメータを設定することができるので、今回のサンプルコードではContactのSalesforceIDを設定します。
<template>
    <lightning-card title="Lms Publisher">
        <div class="slds-m-around_medium">
            <template if:true={contacts.data}>
                <template for:each={contacts.data} for:item="contact">
                    <a href="#"
                        key={contact.Id}
                        onclick={handleContactClick}
                        data-value={contact.Id}
                    >
                        <lightning-layout vertical-align="center">
                            <lightning-layout-item padding="around-small">
                                <p>{contact.Name}</p>
                            </lightning-layout-item>
                        </lightning-layout>
                    </a>
                </template>
            </template>
        </div>
    </lightning-card>
</template>
import { LightningElement, wire } from 'lwc';
import getContactList from '@salesforce/apex/ContactController.getContactList';
import { publish, MessageContext } from 'lightning/messageService';
import RECORD_SELECTED_CHANNEL from '@salesforce/messageChannel/Record_Selected__c';
export default class LmsPublisher extends LightningElement {
@wire(getContactList)
contacts;
@wire(MessageContext)
messageContext;
// Respond to UI event by publishing message
handleContactClick(event) {
event.preventDefault();
const payload = { recordId: event.currentTarget.dataset.value };
publish(this.messageContext, RECORD_SELECTED_CHANNEL, payload);
}
}LMSのSubscriber サンプルコード
Subscriberのコンポーネントでも、メッセージチャネルでメッセージの登録および登録解除を行うには、メッセージチャネルを @salesforce/messageChannel 範囲設定されたモジュールから Lightning Web コンポーネントにインポートします。
import RECORD_SELECTED_CHANNEL from '@salesforce/messageChannel/Record_Selected__c';Lightning Message Service の subscribe() 関数と unsubscribe() 関数をJavaScriptファイルの中で呼び出すことで制御します。@wire(MessageContext) を使用してコンテキストオブジェクトを作成します。
@wire(MessageContext)
messageContext;connectedCallback()でコンポーネントの初期化処理で、Lightning Message Service の subscribe() メソッドをコールして subscription に割り当てます。subscribe() メソッドは、メッセージコンテキスト、メッセージチャネルの名前、公開されたメッセージを処理するリスナーメソッドの 3 つの必須パラメータを取ります。
subscribeToMessageChannel() {
    if (!this.subscription) {
        this.subscription = subscribe(
            this.messageContext,
            RECORD_SELECTED_CHANNEL,
            (message) => this.handleMessage(message),
            { scope: APPLICATION_SCOPE }
        );
    }
}
~~~
connectedCallback() {
    this.subscribeToMessageChannel();
}
disconnectedCallback()でコンポーネントの削除処理の中で、Lightning Message Service からのメッセージの受信を停止するためにお、登録参照を渡して unsubscribe() をコールします。
unsubscribeToMessageChannel() {
    unsubscribe(this.subscription);
    this.subscription = null;
}
~~~
disconnectedCallback() {
    this.unsubscribeToMessageChannel();
}
<template>
<lightning-card title="Lms Subscriber">
<div class="slds-m-around_medium">
<p>{Name}</p>
<p>{Title}</p>
<p>
<lightning-formatted-phone
value={Phone}
></lightning-formatted-phone>
</p>
<p>
<lightning-formatted-email
value={Email}
></lightning-formatted-email>
</p>
</div>
</lightning-card>
</template>import { LightningElement, wire } from 'lwc';
import { getRecord, getFieldValue } from 'lightning/uiRecordApi';
import { ShowToastEvent } from 'lightning/platformShowToastEvent';
// Import message service features required for subscribing and the message channel
import {
subscribe,
unsubscribe,
APPLICATION_SCOPE,
MessageContext
} from 'lightning/messageService';
import RECORD_SELECTED_CHANNEL from '@salesforce/messageChannel/Record_Selected__c';
import NAME_FIELD from '@salesforce/schema/Contact.Name';
import TITLE_FIELD from '@salesforce/schema/Contact.Title';
import PHONE_FIELD from '@salesforce/schema/Contact.Phone';
import EMAIL_FIELD from '@salesforce/schema/Contact.Email';
const fields = [
NAME_FIELD,
TITLE_FIELD,
PHONE_FIELD,
EMAIL_FIELD
];
export default class LmsSubscriber extends LightningElement {
subscription = null;
recordId;
Name;
Title;
Phone;
Email;
@wire(getRecord, { recordId: '$recordId', fields })
wiredRecord({ error, data }) {
if (error) {
this.dispatchToast(error);
} else if (data) {
fields.forEach(
(item) => (this[item.fieldApiName] = getFieldValue(data, item))
);
}
}
@wire(MessageContext)
messageContext;
subscribeToMessageChannel() {
if (!this.subscription) {
this.subscription = subscribe(
this.messageContext,
RECORD_SELECTED_CHANNEL,
(message) => this.handleMessage(message),
{ scope: APPLICATION_SCOPE }
);
}
}
unsubscribeToMessageChannel() {
unsubscribe(this.subscription);
this.subscription = null;
}
handleMessage(message) {
this.recordId = message.recordId;
}
connectedCallback() {
this.subscribeToMessageChannel();
}
disconnectedCallback() {
this.unsubscribeToMessageChannel();
}
dispatchToast(error) {
this.dispatchEvent(
new ShowToastEvent({
title: 'Error loading contact',
variant: 'error'
})
);
}
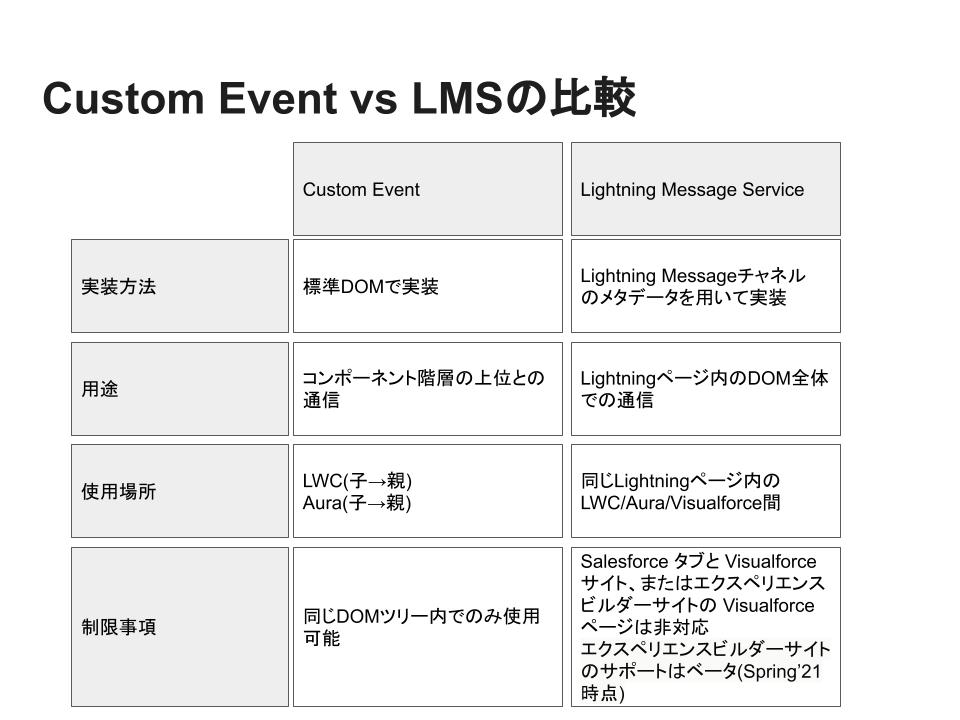
}Custom Event vs LMSの比較
参考
Communicate with Events
https://developer.salesforce.com/docs/component-library/documentation/en/lwc/lwc.events
Message Service
https://developer.salesforce.com/docs/component-library/bundle/lightning-message-service/documentation
Lightning Message Service を使用した DOM 間の通信
https://developer.salesforce.com/docs/component-library/documentation/ja-jp/lwc/lwc.use_message_channel